The reason I'm changing the way I'm doing this is because in my previous trials, the cotton was still saturated with liquid by the time I applied the dye, which I suspect caused the pale colors. I'm also unhappy with the state of the cotton after the process was over. Though I was careful, a lot of the cotton is moderately ropey now. It's not unusable, but will definitely be a pain to process into something spinnable. Also, during the process, the clumps of cotton developed air bubbles which may have also affected the availability of the fibers to the dye.
 |
| 3 ounces of roughly combed cotton |
It was a huge pain in the ass, and I kept having to remind myself to do a shitty job since I wasn't going to be spinning yet. I just needed enough effort to roughly organize the fibers. Look at all of that, and it's only 3 ounces! I've got about a pound more to do in the future.
 |
| Washed cotton logs drying in the sun |
Once the cotton was completely dry again, I was ready to dye. My idea was to use the recommended amount of dye per volume of water for one batch, and then increase the proportion of dye in two more batches. I planned to do this for two different colors, 22 Cobalt Blue, which requires twice the amount of dye as most of the dyes, and 50 Jade Green, which requires the standard amount of dye, but because it has a tiny amount of copper in it, it does better when exposed to heat. What's this now? What happened to Deep Orange? Honestly, I do not need any more orange fluff. Changing colors certainly makes this experiment harder to compare to previous methods, but as long as the outcome is intense, as opposed to pastel, I will be happy. Anyway the following table is the result of a lot of math:
Cobalt Blue
|
Jade Green
| |
Recommended Amount of Dye
|
2 tsp dye per ½ cup of water
1:12 ratio
|
1 tsp dye per ½ cup of water
1:24 ratio
|
Recommended + ½
|
3 tsp dye per ½ cup of water
1:8 ratio
|
1 ½ tsp dye per ½ cup of water
1:16 ratio
|
2x Recommended
|
4 tsp dye per ½ cup of water
1:6 ratio
|
2 tsp dye per ½ cup of water
1:12 ratio
|
 |
| The dye powder measured into scrap paper weigh-boats ahead of time (Protective mask, eyewear and gloves used of course) |
 |
| Pasting-up in progress |
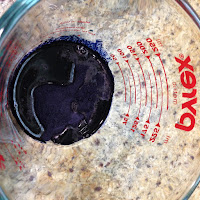
Golly, for some reason, I thought it would be a good idea to lay out my cotton on plastic wrap and squirt the dye onto it from there. It was not a good idea. My execution left a lot to be desired. First of all, I was shocked when the dye just beaded on the surface of the cotton and then rolled off. Then I was horrified when the dye started to puddle and flow towards the end of the plastic wrap. Look at this stuff. Do you want that spilling onto your countertops and dripping onto the floor? If I made my coffee that black I'd be up for days. Anyway, I resorted to massaging the logs of cotton to encourage them to absorb the dye, which they eventually did. You know, cotton fibers are actually made of layers of cellulose arranged in a particular fashion, with a final waxy coating. I was under the impression that the wax was removed during the process of scouring and washing. So imagine the pit in my stomach upon the realization that the wax was obviously still there, repelling the water. Would it even take the dye? Well, it was too late to turn back now. So I massaged away and then awkwardly wrapped everything up in the plastic wrap. Time for Plan B.
Moving forward, I decided to use sealable bags instead. I put about a half ounce of cotton in each bag. I would then mix up my dye as before, then pour it directly into the bag with the cotton. I sealed the bag and massaged the heck out of that cotton. Once I was satisfied the the dye had been throughly absorbed, I squeezed out as much air as possible and made the final seal.
 |
| Ha ha ha look at this slippery blue turd ensconced in plastic wrap. Such a terribad idea |
 |
| Eventually, the cotton accepts the dye and the volume decreases. |
 |
| Rinsing |
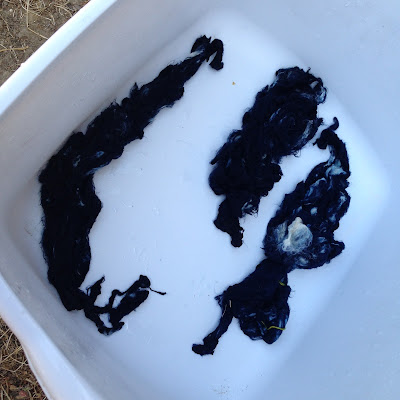
Meanwhile, I warmed up a pot of water on the stove. I took the pot off the heat and put the bags of Jade Green cotton in the hot water bath. The Cobalt Blue bags were unceremoniously dumped in a plastic basin. My plan was to leave all of this stuff outside for 24 hours, but I got a little, um, distracted by someone special and I didn't get to rinsing until 10 hours later than what I had planned. I took the cotton out of the bag and rinsed and rinsed and rinsed and, oh my gawd, blue dye is still coming out and the cotton is still BLACK. You can see the rinse water in the photo. Every bag was like this. My conclusion is that I really went overkill on the dye and don't need that much at all. Also check out the holidays. I need to work on my masseuse skills. Once I was satisfied with the clarity of the rinse water (in all honesty I was just bored waiting) I put it all in plastic basins outside, filled them with water from the hose and let it sit overnight. The next morning the soak water was freakin' dark with excess dye. After one more rinse and a squeeze, look at what I've got.
Conclusions and Results
 |
| Cobalt Blue post-soak |
 |
| Jade Green post-soak |
 |
| From right to left: Cobalt Blue at 1:6, 1:8, and 1:12 dye to water ratio and Jade Green at 1:12, 1:16, and 1:24 dye to water ratio. The leftmost log for each color represents the recommended ratio. |
 That's nice and all, but is this what these colors are supposed to look like? Not really. The color came out way darker than the color swatch indicated. Swatch 22 to the left there is for Cobalt Blue, and as you can see, the fibers, even at the very tip of my combed log, are way darker than the swatch. Though my camera is crap at showing it, I'm much closer to 130 Strong Navy. Swatch 50 indicates Jade Green, but the actual fibers are much closer to 153 Mermaid's Dream and 146 Kingfisher Blue.
So freakin' what you say, but here's my objection. If I wanted those colors, I would have just used those dyes. When I did the final rinse, there was way too much dye going down the drain. What a waste of both dye and water. Because of my fuzzy navel experience I went overkill. Don't get me wrong though, I appreciate the level of color saturation for sure, and I'm much encouraged. So, moving forward, here's my plans for next time:
- Combing the cotton ahead of time was a great idea, though tedious. The fiber didn't tangle during the dyeing process, and after all was said and done, it wasn't that difficult to re-comb it. Next time though, I will make the logs smaller (say, less than a foot long) and less thick (less than three layers of combed cotton) in order to reduce the amount of holidays during dyeing.
- In no way did I need as much dye as I used. It produced unexpected results and way too much wasted water and excess dye that gets washed out. Next time I will try another experiment, probably with the Jade Green again, because it's such a lovely color. I will try three more batches 3/4 tsp, 1/2 tsp, and 3/8 tsp of dye per 1/2 cup of water. (1:32, 1:48, 1:64 water to dye ratio.) It should be interesting to see which one of those hits the target color.
- I'm debating whether or not I really need to wash with PTD ahead of time or not.
- A 1:1 ratio of cups of water to ounces of fiber seemed to work well, despite the holidays in this round. With enough massaging, and making thinner logs of fiber, I think there's plenty of fluid to saturate the fibers.
- It seems to me adding the soda ash to the dye rather than pre-soaking the fiber in a soda ash solution was key in producing the saturation seen in my samples. It's really the only meaningful difference between this experiment and the tie dye-like direct application method I used. That time I let the fibers sit for over 24 hours as well. While I'm sure letting it sit and develop os important, I think what's more important is to not have fiber that is already wet, thereby diluting the dye.
- Since I'm not trying to paint the fibers a rainbow of colors at once, there is no reason to use plastic wrap. I plan to keep using sturdy resealable bags. They can be rinses and used multiple times, and they really help me keep everything neat and organized.
Anyhow, I won't be getting to this next experiment any time soon as I have other projects that I need to finish, but I will share my results when I get to it.
No comments:
Post a Comment