Monday, July 4, 2016

The Process: 002 Dyeing Cotton Lint (Cold-Hearted Batch)

I was disappointed with the results from both tub-dyeing and direct application, so I tried something similar to the method I used when I brushed fiber reactive dye directly onto fabric, only leaving out a thickener since I won't be applying the dye as one would apply paint. I was pretty happy with my results from my painting, but unfortunately I don't have any photos. The process involves making a batch of chemical water, which includes urea and sodium alginate. The urea helps dissolve the dye, thereby increasing your yield, and it also keeps it wet, which is necessary for the reaction between the fiber and the dye. The alginate is the thickener, so I left that out. The sketchy part is once you add the dye to the chemical water, you also add the soda ash. This means you need to use the dye within the hour. While soda ash raises the pH, which makes it easier for dye particles to react with the fiber, soda ash also reacts with the dye itself, making it inert. That made painting very nerve wracking. There's no fussing about and no carrying on a painting for longer than an evening. However, I'll be applying the dye to my cotton almost immediately so hopefully the time limit won't matter. Since I had such good results with my painting, I'm feeling a little more optimistic here.

The reason I'm changing the way I'm doing this is because in my previous trials, the cotton was still saturated with liquid by the time I applied the dye, which I suspect caused the pale colors. I'm also unhappy with the state of the cotton after the process was over. Though I was careful, a lot of the cotton is moderately ropey now. It's not unusable, but will definitely be a pain to process into something spinnable. Also, during the process, the clumps of cotton developed air bubbles which may have also affected the availability of the fibers to the dye.

3 ounces of roughly combed cotton
To address these issues, I combed my cotton into foot-long roving like logs. You would probably card them into loose rolags. Nobody I know of hand-combs cotton. Just me, because that's what I have. Combs. Anyway, my idea was that in organizing the fibers ahead of time the cotton will be easier to handle during and after the dying process, and hopefully will make the fibers more available to the dye.

It was a huge pain in the ass, and I kept having to remind myself to do a shitty job since I wasn't going to be spinning yet. I just needed enough effort to roughly organize the fibers. Look at all of that, and it's only 3 ounces! I've got about a pound more to do in the future.

Washed cotton logs drying in the sun
Wearing exam gloves, I washed each log individually with PTD, and then rinsed them in a wire strainer. Then I let the suckers dry. Actually, I ran the hair dryer on them for awhile, but damn it, I had already spent enough time with these guys, so eventually I just crossed my fingers that they wouldn't blow away or get stolen for nesting material, and put them outside in the sun. I took a bike ride to the cafe and had some espresso. That was more fun than running the hairdryer.

Once the cotton was completely dry again, I was ready to dye. My idea was to use the recommended amount of dye per volume of water for one batch, and then increase the proportion of dye in two more batches. I planned to do this for two different colors, 22 Cobalt Blue, which requires twice the amount of dye as most of the dyes, and 50 Jade Green, which requires the standard amount of dye, but because it has a tiny amount of copper in it, it does better when exposed to heat. What's this now? What happened to Deep Orange? Honestly, I do not need any more orange fluff. Changing colors certainly makes this experiment harder to compare to previous methods, but as long as the outcome is intense, as opposed to pastel, I will be happy. Anyway the following table is the result of a lot of math:


Cobalt Blue
Jade Green
Recommended Amount of Dye
2 tsp dye per ½ cup of water
1:12 ratio
1 tsp dye per ½ cup of water
1:24 ratio
Recommended + ½
3 tsp dye per ½ cup of water
1:8 ratio
1 ½  tsp dye per ½ cup of water
1:16 ratio
2x Recommended
4 tsp dye per ½ cup of water
1:6 ratio
2 tsp dye per ½ cup of water
1:12 ratio


The dye powder measured into scrap paper weigh-boats ahead of time
(Protective mask, eyewear and gloves used of course)
I mixed 3 tablespoons of urea into 3 cups of warmed distilled water to make my chemical water. I used a little bit of this water to paste-up my dye. In a separate cup I poured in nearly a half cup of the chemical water and dissolved a half teaspoon of soda ash into that before pouring it into the dye paste-up. I'd add more chemical water if I didn't quite make it to a whole half cup.
Pasting-up in progress
Golly, for some reason, I thought it would be a good idea to lay out my cotton on plastic wrap and squirt the dye onto it from there. It was not a good idea. My execution left a lot to be desired. First of all, I was shocked when the dye just beaded on the surface of the cotton and then rolled off. Then I was horrified when the dye started to puddle and flow towards the end of the plastic wrap. Look at this stuff. Do you want that spilling onto your countertops and dripping onto the floor? If I made my coffee that black I'd be up for days. Anyway, I resorted to massaging the logs of cotton to encourage them to absorb the dye, which they eventually did. You know, cotton fibers are actually made of layers of cellulose arranged in a particular fashion, with a final waxy coating. I was under the impression that the wax was removed during the process of scouring and washing. So imagine the pit in my stomach upon the realization that the wax was obviously still there, repelling the water. Would it even take the dye? Well, it was too late to turn back now. So I massaged away and then awkwardly wrapped everything up in the plastic wrap.  Time for Plan B.
Ha ha ha look at this slippery blue turd ensconced in plastic wrap. Such a terribad idea
Moving forward, I decided to use sealable bags instead. I put about a half ounce of cotton in each bag. I would then mix up my dye as before, then pour it directly into the bag with the cotton. I sealed the bag and massaged the heck out of that cotton. Once I was satisfied the the dye had been throughly absorbed, I squeezed out as much air as possible and made the final seal.
Eventually, the cotton accepts the dye and the volume decreases.

Rinsing
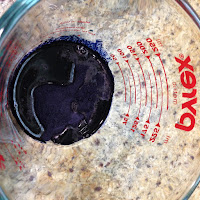
Meanwhile, I warmed up a pot of water on the stove. I took the pot off the heat and put the bags of Jade Green cotton in the hot water bath. The Cobalt Blue bags were unceremoniously dumped in a plastic basin. My plan was to leave all of this stuff outside for 24 hours, but I got a little, um, distracted by someone special and I didn't get to rinsing until 10 hours later than what I had planned. I took the cotton out of the bag and rinsed and rinsed and rinsed and, oh my gawd, blue dye is still coming out and the cotton is still BLACK. You can see the rinse water in the photo. Every bag was like this. My conclusion is that I really went overkill on the dye and don't need that much at all. Also check out the holidays. I need to work on my masseuse skills. Once I was satisfied with the clarity of the rinse water (in all honesty I was just bored waiting) I put it all in plastic basins outside, filled them with water from the hose and let it sit overnight. The next morning the soak water was freakin' dark with excess dye. After one more rinse and a squeeze, look at what I've got.

Conclusions and Results
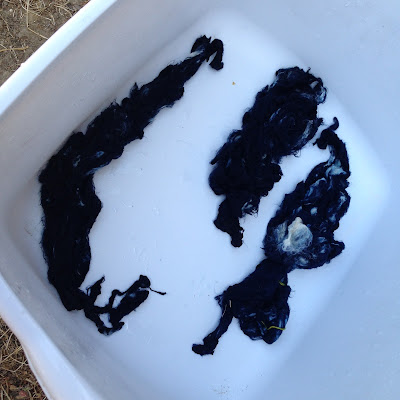
Cobalt Blue post-soak


Jade Green post-soak
Well, that's certainly more intense than my previous results.  You'll notice there are holidays where the dye didn't penetrate despite my massaging. I did a little combing and compared the different dye batches, avoiding the holidays. I'll still use the undyed fiber, but I really want to focus on the color of the fibers that did get exposed to the dye.
From right to left: Cobalt Blue at 1:6, 1:8, and 1:12 dye to water ratio and Jade Green at 1:12, 1:16, and 1:24 dye to water ratio. The leftmost log for each color represents the recommended ratio.
That's nice and all, but is this what these colors are supposed to look like? Not really. The color came out way darker than the color swatch indicated. Swatch 22 to the left there is for Cobalt Blue, and as you can see, the fibers, even at the very tip of my combed log, are way darker than the swatch. Though my camera is crap at showing it, I'm much closer to 130 Strong Navy. Swatch 50 indicates Jade Green, but the actual fibers are much closer to 153 Mermaid's Dream and 146 Kingfisher Blue.

So freakin' what you say, but here's my objection. If I wanted those colors, I would have just used those dyes. When I did the final rinse, there was way too much dye going down the drain. What a waste of both dye and water. Because of my fuzzy navel experience I went overkill. Don't get me wrong though, I appreciate the level of color saturation for sure, and I'm much encouraged. So, moving forward, here's my plans for next time:

  • Combing the cotton ahead of time was a great idea, though tedious. The fiber didn't tangle during the dyeing process, and after all was said and done, it wasn't that difficult to re-comb it. Next time though, I will make the logs smaller (say, less than a foot long) and less thick (less than three layers of combed cotton) in order to reduce the amount of holidays during dyeing.
  • In no way did I need as much dye as I used. It produced unexpected results and way too much wasted water and excess dye that gets washed out. Next time I will try another experiment, probably with the Jade Green again, because it's such a lovely color. I will try three more batches 3/4 tsp, 1/2 tsp, and 3/8 tsp of dye per 1/2 cup of water. (1:32, 1:48, 1:64 water to dye ratio.) It should be interesting to see which one of those hits the target color.
  • I'm debating whether or not I really need to wash with PTD ahead of time or not.
  • A 1:1 ratio of cups of water to ounces of fiber seemed to work well, despite the holidays in this round. With enough massaging, and making thinner logs of fiber, I think there's plenty of fluid to saturate the fibers.
  • It seems to me adding the soda ash to the dye rather than pre-soaking the fiber in a soda ash solution was key in producing the saturation seen in my samples. It's really the only meaningful difference between this experiment and the tie dye-like direct application method I used. That time I let the fibers sit for over 24 hours as well. While I'm sure letting it sit and develop os important, I think what's more important is to not have fiber that is already wet, thereby diluting the dye.
  • Since I'm not trying to paint the fibers a rainbow of colors at once, there is no reason to use plastic wrap. I plan to keep using sturdy resealable bags. They can be rinses and used multiple times, and they really help me keep everything neat and organized.
Anyhow, I won't be getting to this next experiment any time soon as I have other projects that I need to finish, but I will share my results when I get to it.

Tuesday, June 28, 2016

Bullshit Crafting Product: 001 Decorative Cotton Bolls

Oh what serendipity. I'm in the middle of processing, dyeing, and spinning the cotton that my father and I have grown ourselves. I've also been researching this wonderful fiber to better understand how to do all of these things to it. Then I run into these things, real cotton bolls tied to a wreath or tied to floral wire in a spray. You would think I would be excited about seeing these things, like, "Oh hey, here's a thing I'm totally into right now, made into home decor! I should decorate my house in cotton bolls and then everyone will call me "The Cotton Gal', and I'll be all about that cotton all the time. Oh that wacky LuRo and her cotton!"

Certainly a Good Use of Materials

Lately I have been posting away about my dye experiments with cotton lint, but I'm up to other things as well you know. I made the mistake of liking penguins as a child and people still keep giving me penguin things. I'm not about to start another "thing" ever again. Anyway, being into other things, I reluctantly made a trip to the nearest craft store because there was a thing I needed.

To get to the thing I needed, I had to walk through the now requisite bins and shelves of things that are not crafts. The cotton wreaths and sprays were one of the many non-craft things that were there. Oh sure, you could incorporate those sprays into a floral arrangement, or you could embellish the wreath with other bullshit, but we're cutting really close to Sandra Lee Semi-Homemade territory, and at least she has the excuse of needing to feed herself and her family. No one needs to glue shit to a wreath under such duress that you have to buy a pre-made wreath much like how Sandra Lee makes cake out of pre-made cake.

So instead of moving on with my errand and ignoring the garbage, I stuck around to inspect it because I'm an asshole and love being mad about inconsequential things. The wreath already had a dead mosquito embedded in the fibers. Lovely. Now imagine this thing hanging on your front door or in your house for a season, getting covered in dust and accumulating spiders. How the hell are you going to clean it? Smacking the dust out or vacuuming up the cobwebs would destroy it.

Don't even ask me if I touched it because of course I touched it. It's made of real cotton bolls, and yeah, I kinda pulled the fibers out a little. It's not the greatest cotton. The staple length is pretty short but it is very white. At the price of $29.99, it's certainly not cost effective to rescue the cotton in the wreaths to spin them. The tag also says its made in China, but who knows where the cotton was actually grown, but it was grown somewhere, and in that place the soil was tilled and watered and cotton was planted. It was harvested and instead of being used for making fabric, cotton balls, or topping of the tips of ear swabs, these bolls got sent to some factory where they got tied up to a wreath or twigs of floral wire so that you can display it in your house for a limited amount of time before it gets dirty and ends up in a landfill. It was pretty crappy cotton, so maybe it was going to get tossed anyway, but considering how white and attractive the bolls are, I think not. There's a chance this crap was grown specifically for this application. What a waste.

Anyway let's wrap this up:

Bullshit Scorecard


Dubious qualification as crafting supplies
-5
Great spider-house
-8
Bizarro misuse of materials
-8
Grand Total
-21

Sunday, June 26, 2016

The Process: 001 Dyeing Cotton Lint (Deep Orange? More Like a Fuzzy Navel)


I'm really jealous of the Wool People. There's so many fun fibers and colors of fibers for them to play with, but I have my insane reasons for limiting myself to cotton. In the meantime, I'm diligently spinning an entire pound of white cotton sliver, and surprise, it's not that exciting. I have plans to dye it after it's plied, but that's a long ways off. So, I got to thinking, if the Wool People are able to dye their Superwash Merino before spinning, well, could I do the same with cotton? Joan Ruane, the cotton guru, has done it before, and so maybe I can too. Then I'll have a ton (well, just under 2 lbs) of pretty fibers running through my fingers as I spin my favorite fiber ever.

Dyeing cotton is not a new experience for me. I've done a lot of shirts, sheets, and fabric. I've tie-dyed, tub dyed and painted with dye. I've taught other people to do it. I've overseen classes on dyeing. I'm not that good at it, but I understand, or at least have heard of, most of the basic ways you can add color to cotton. However, other than on the internet (and even that information is scarce), I have yet to see anyone dye cotton lint. There might be a reason not to. I'm going to find out. I tried two different methods. Tub dyeing and direct application.

Tub Dyeing

I tried to kinda-sorta followed Joan's directions and Dharma's. The following is an account of what really happened. I do not blame you for skimming past right to the results.
Oh no, it doesn't fit!
    1. I started up the computer and kick-ass sound system, then navigated to Pandora.com to put on Bjork.
    2. While the cotton lint is probably up to 99% cellulose, there might be other weird crap on there that will prevent the cellulose from accepting the dye, like natural pectins, or oils from my greasy taco fingers. So, I scoured 1.50 oz. of raw cotton with 3/4 teaspoon of Professional Textile Detergent in 1/2 gallon of water in a cooking pot that I no longer use for cooking.
    3. With gloves on, because this detergent is brutal, I submerged 1.50 oz. cotton  into the pot and squished it a little until saturated with water. At first it seemed like, holy shit, way too much cotton! With a few squeezes, I made it fit easily, with some room even. 
      Never mind
       
    4. I turned on the burner and let simmer for about 15 minutes. The reviews on this detergent complain about fumes, so I was a little worried about doing this, but I didn't get any fumes. Or maybe I gave myself brain damage such that I can't smell anymore. Who knows. I pulled the cotton up and flipped it over with spatula, then smashed it a little with spatula, all the while trying not to pull too much on the cotton, which would end up making unusable rope.
    5. I decanted the water down the drain. It was really gross and brown, which lets me know that I wasn't just wasting my time. After letting it cool a bit I rinsed the cotton multiple times in a wire colander.
      Everything's pre-measured and ready to go
    6. As far as the dyeing process goes, I weighed out all of the dry ingredients ahead of time, while wearing gloves, eye protection, and a dust mask. Most messes come from being rushed, ill prepared, and disorganized. If you weigh out your stuff ahead of time, all you have to do is add your ingredients when you're ready.
    7. I microwaved a cup of water for a minute and a half and dissolved 3 tsp of urea into it.
    8. I microwaved a little more water, added 0.03 oz of dye to it, and made a paste out of it.
    9. I added the urea-water to the dye to make a slurry. If I'm being completely honest, I actually did all of this while waiting for the pre-wash earlier.

    10. When ready, I poured a half-gallon of water into a pot and dissolved 1/2 cup of salt into pot. The salt is supposed to bring the dye to the cotton fibers. It does not fix the dye to the fiber as some mistakenly believe. Think of it this way; you have this dilute concentration of dye. It's going to need some help locating the fiber. Salt is the match-maker.
    11. I warmed up the water on the stove. I'm doing all of this heating because it will help move the particles around, dissolve them in the water, and encourage chemistry to happen.
    12. Being careful not to splash, I added the dye slurry to the pot of water.
      Half the fun is not having to clean up a big mess
    13. In went the cotton. I pushed down on floating clumps and 
      agitated occasionally. I kept a plastic cup nearby as a spatula rest in order to prevent messes.
    14. As the cotton was just sitting there in the dye bath, I dissolved 2 3/4 tsp of soda ash in warm water.
    15. After about 10 minutes, I pushed the cotton aside and added 1/2 of the soda ash-water to the dye bath.
    16. Another 10 minutes passed by before adding the rest. I pulled some fibers out intermittently, and noticed more of a golden color rather than deep orange, but 10 minutes later it seemed to be getting deeper!
      Looks promising!
    17. I stirred frequently for a half hour, trying to get those dye particles to meet the fiber, which would hopefully pop off the hydrogen from the hydroxyl groups in the basic environment. Yeah baby, drop those hydrogens.
    18. I dumped the dye bath, and then rinsed with cool water. When cool, I smooshed the cotton into a ball and gave it a good squeeze, then continued to rinse until the water was pretty clear.
    19. The pre-wash instructions were repeated.
    20. There was a final rinse and then I let it dry.


    Direct Application Method

    I'll discuss my results later, but *spoiler* I did not like my results. So I tried more of a tie-dye technique. My hope was that in introducing the dye to the fibers directly, I would get a more intense color. Anyway, I won't repeat the pre-wash directions because the are the same. By the way, I substituted Kate Bush for Bjork.

    1. I microwaved 4 cups of water, and dissolved 1/4 cup of soda ash in it.
    2. I poured all of that in a plastic tub, and after squeezing all pre-wash rinse-water out of the cotton, I soaked the cotton in the soda ash water.
    3. Meanwhile, I dissolved 3/8 tsp urea into 1/8 cup of water. I added some of that to 1/4 tsp dye and pasted it up. Then just said screw it and added the rest of the urea-water before pouring it carefully into a squeeze bottle.
    4. I squirted the dye onto cotton, then gave it a nice little massage. 
    5. I put the cotton in a vegetable bag, and squeezed out all of the air, then put that in a sealable freezer bag. I left it in the backyard, hoping it would stay warm, although I'm not sure if exposure to the sunlight was a bad idea. Anyway, I forgot about it for 24 hours before washing it with PTD again.


    Results and Conclusions

    Neither of the methods produced Deep Orange. Unfortunately my camera phone doesn't convey the results accurately, so you'll have to trust me that the direct application method produced deeper, brighter, more saturated color, and it was also easier and less messy. It's so annoying, I'm looking at my dyed fibers with my own eyeballs right now, and the difference is so obvious. But they both suck, so maybe the true color not showing up great in these photos doesn't matter.
    Top: Tub Dye Method
    Bottom: Direct Application Method

    Look at the lighter regions of the fibers to understand what I'm trying to convey here. The shaodows make the fiber look more saturated than they are. Tub dying produced more of an Orange Sorbet while the direct application almost exactly matches Orange Crush.

    Yeah, yeah, it's still pretty, but it's not what I was going for. As it turns out, if I had done a little more research ahead of time, I would not have been so surprised. Leigh's Fiber Journal tried pretty much the same thing with the same materials and produced the same weak-ass results.

    It's not like I went into this unprepared either. I did research and made careful calculations based on the dry weight of my fiber. However, the amount of chemicals I used came from recommendation for cotton items that have already been woven or knitted. Perhaps the core of a thread is not completely penetrated by the dye bath, and here I am trying to dye every single fiber, like an idiot. Why the hell do I want to do this again? If my hunch here is true, then that means I must increase the amount of dye per ounce of cotton lint. That seems a bit wasteful.

    Another thing I learned recently is that soda ash doesn't just interact with the cellulose fibers, it reacts with the dye particles too, rendering them gradually less effective over a short period of time. Because of this, your dye bath will never be exhausted or clear as in acid dyeing in wool. You will always have some shitty dye particles left over. I don't like that, not only because it's wasteful, but because that seems pretty crap environmental-wise. The reason I have been so careful with measurements has been to eliminate waste as much as possible.

    For the next time, I've got some changes I'm considering. Primarily, I need to use more dye. When I started this project, I calculated the amount of dye needed based on the dry weight of the fiber. I'm beginning to think that the amount of cotton isn't all that relevant to calculating how much dye you need. I have a hunch the concentration of the dye being applied to however much fiber you have is more important. This is why I'm also going to try to dry out the fibers between pre-washing and dyeing. In both the tub dyeing and direct application methods, the fibers were pretty well saturated with liquid before applying the dye, which may have caused the dye to be too dilute for good results. Why this doesn't seem to matter with pre-made articles of clothing or yarn currently evades me.

    There were some challenges with physical properties as well. The clumps of cotton are difficult to break up without forming unusable rope. These clumps also form air bubbles which prevent the fibers from coming into contact with the dye. Moving forward to address this issue, I will be doing a craptacular job of combing the cotton into some rough roving-like logs. Hopefully this will make the fibers more available to the dye without me having to stir up the fibers and tangle them.

    Everyone else in the world who felt like dyeing cotton lint would be neat-o is probably just going to be happy with their pastels, and that is fine. For me personally though, things are going pretty well in my life, so in order to keep my karma balanced, I feel like this is a pretty safe thing to stress myself out about.

    Wednesday, June 15, 2016

    Science of Craft: 002 We're Dyeing (Cotton) All the Time

    So I was on Pinterest the other day and ran into the same old shortcuts that I've seen since the beginning of Pinterest. I don't know what is so damn intimidating about dyeing that people are always looking for ways to customize clothing and fabric with anything but the very thing that will give you quality, permanent, and predictable results. I know "the establishment" isn't really popular right now, but dyeing the tried-and-true established way is actually pretty easy. Just go to Dharma Trading. Their instructions are easy, and every time I've had a question, they've been happy, like, really happy to help.

    Now if you are interested in the seemingly not-easy part of dyeing, read on. I'll be discussing why all fabric coloring techniques are not alike, and why using Procion MX dyes are a superior choice for cotton, using what little I know about chemistry.

    Dyeing Cotton

    Remember my post on the chemical structure of cotton? You should take a look at it before proceeding. Anyhow, behold the star of the show below. This is cellulose, which is a popular fiber used in clothing.
    A cellulose unit

    The Hydroxyl Group

    Try to find all six OH groups on the cellulose diagram above. These are called the hydroxyl groups and they are where the awesome stuff happens.

    A generic hydroxyl group where the green thing could represent just about anything, even the rest of a cellulose molecule.
    The hydroxyl group is where the dye molecule is going to attach. As you can see in the cellulose structure, there are a lot of places where this can happen. Six places in just one unit in fact. That's why cotton dyes so well, provided you use the right kind of dye and follow the instructions.

    When I say, "the right kind of dye" what I'm talking about is fiber reactive dye. Not food coloring, not Kool-aid, not permanent markers, not paint, and for the love of all that is good in the world, not Rit-freakin' dye. Below is one example of the right kind of dye:

    Orange 4

           
    This is Orange 4, known as Procion MX 6 Deep Orange over at Dharma's. This is one of the colors I'm going to be using soon, and has one of the more constant structures, so that makes it a nice example.

    Let's take a tour of this molecule. The complex part that I drew in orange is the chromophore. This is the actual color part. It absorbs and reflects certain wavelengths of light such that you see it as orange... Deep Orange. The part I drew in pink is the reactive group which will be binding strongly to the cellulose molecule. The grey part is the bridging group and it connects the chromophore to the reactive group. So there's three parts; the chromophore, the reactive group, and the bridge that connects them.

    Now we just need to bind that reactive group of the dye to the hydroxyl group of the cotton. As-is, the hydroxyl group isn't really ready for a relationship. It needs to ditch the hydrogen before it can bond to the chlorine from the reactive group. The cellulose isn't into doing that at regular temperatures so you need an aqueous, basic environment to give it a little encouragement. What is commonly used is soda ash, which is often referred to as a dye "fixer." No, you can't just substitute the old box of baking soda that's freshening up your stinky fridge. Baking soda has the same structure as soda ash, less one sodium ion. That tiny detail makes all the difference in providing an effective solution for dyeing, so don't half-ass it. Get the right stuff. Anyway, once you place the cotton in a solution with soda ash, those hydrogens should pop off the oxygens, and be replaced with the chlorine from the reactive group. Like so:
    One molecule of Orange 4 bonded to cellulose


    That's a nice covalent bond right there folks. Just look at it. Covalent bonds are very strong bonds, making the dye a permanent part of the item you are dyeing. It won't fade, wear out, rub off on other items, bleed in the laundry or any of that. This is why fiber reactive dyes are so superior.

    Plus, if you ask me, the whole thing was pretty damn simple. You have your cotton, your dye, and a chemical that helps the dye bind to the cotton. You don't have to iron it, steam it, or add vinegar to make it stick. In all my years in the craft industry, I have heard every weird "trick" for adding color to fabric and I seriously don't know what compels people to try these things other than that Rit, food coloring, vinegar, and irons are things that can either be easily acquired at the grocery store or are already available in the home, and that somehow creates the illusion of cost-effectiveness. Or maybe it's just cute to say you colored your shirt using Kool-aid and a microwave. Anyway, these things just do not bind to your fabric in the same way that fiber reactive dyes do, that is, if they bind at all.

    Now, what about paint? It's a legit practice. Screen printers usually use paint to make your graphic T-shirts after all, plus, there are plenty of paints made specifically for fabric. As an 80s baby, I have a special love for puffy paint. However, there are huge differences between dyes and paints. Paint, whether it's for fabrics or some other application, is made of a pigment or colorant that is unable to bond with the fabric fiber the way dyes do. So, the pigment has to be mixed with a glue that will bond the color permanently to the fabric.

    The thing I don't like about fabric paint is that it alters the hand or feeling of your fabric, often making it stiff or rough. Fabric paints, especially ones with a lot of white in it, don't wear incredibly well either, often cracking or flaking off. Dye-na-flow paints don't have this problem, and I used them a lot during my silk scarf period, but I wonder why the hell I didn't just use dye then.

    Anyhow, if you're ready to dye, I'd steer you towards Dharma Trading's Tub Dyeing Instructions, as these are more or less the instructions I'll be following. I documented my process here.

    If you're interested in learning more about the chemistry of dyeing, I'd suggest Paula Burch's site. I have learned a lot from her writing which has improved my results.


    Monday, June 13, 2016

    Science of Craft: 001 What is Cotton?

    I'm a hippy-dippy Whole Foods shopper. I buy healthy, organic, free-range, fair-trade, sustainable, recycled, recyclable, eco-friendly and ethical. I might be fooling myself that the higher prices I'm paying at Whole Foods or my local co-op are really giving me any benefit, but I'm hoping. It's hard to keep hoping though because I often find myself in some pretty bizarre company at these stores. I'll overhear folks parroting specious Food Babe claims about staying away from chemicals and ingredients with complicated names and it just makes me shake my head. Everything is made of "chemicals" dummy. Even that locally-sourced organic strawberry. Yummy, wholesome chemical goodness!

    Cotton is made of chemicals too. Sugar, in fact. And no, I'm not getting confused by cotton candy, though the confection and the material your shirt is made of do have some things in common chemically. The chemical composition of cotton is important to understand if you're going to be working with the fiber. It determines the structure of the fiber and that influences how you manipulate it into thread or yarn, and finally into a textile. The chemistry of cotton determines the properties of cotton that in turn determine the application for which we use this fiber. Understanding the chemistry of cotton also helps us know how to dye this fiber and with what. I'm not a scientist, so I'm sure if I can understand why cotton has so many useful and frustrating properties, so can you.

    Cotton's Chemical Composition

    Do you remember learning about photosynthesis in high school biology? Someday I'll get more into it, but for now, all you need to know is that one of the products of photosynthesis is glucose, and plants string together a bunch of glucose molecules to make cellulose. When cereals advertise that they are high in fiber, cellulose is just one of the many kinds of plant fiber that you'll be sending through your poop-chute. All plants produce cellulose, hence why many plants, like bamboo and flax to name a few, can be processed into spinnable fiber. What makes cotton so special though, is that its bolls are made of over 90% cellulose in nice, long fibers, making it almost immediately ready to spin. But what actually is cellulose, and what makes it so suitable for spinning? Let's explore the chemical structure. Don't get scared, I'm going to try to make this easy. If you are a better chem-nerd than me however, I would kindly solicit any further details you can provide in the comments below, thanks in advance.

    Sugars

    Earlier I said that cotton is made of sugar, and if I remember correctly, you interrupted to tell me I must be confusing cotton with cotton candy. I understand your confusion. If you put cotton candy in your mouth, it dissolves. If your dentist shoves cotton balls in your mouth, it just stays there getting soggy and bloody. So what's the deal? Well, cotton candy and cotton balls are made out of different kinds of sugar in different arrangements, that's all.

    All of the different kinds of sugar are really just carbohydrates that often like to form rings. Carbo is for the carbon atoms that are in sugar. Hydrate for H2O that's in there too. That's it. Three elements, carbon, hydrogen, and oxygen. You put those together in different ways and it gives you different properties. Let us take a look at two of the many, many ways of putting those ingredients together.

    The cellulose molecule: What cotton balls are made of

    The sucrose molecule: What cotton candy is made of

    Learning Break

    Take out a scrap of paper and make a column for cellulose and a column for sucrose. We're going to be looking for similarities and differences. It's good for learning if you actually do this instead of just reading what I've already noticed. So, the following are the things you are going to be hunting for, using the two pictures above as reference:
    • The number of oxygens (O), hydrogens (H), and carbons (C) in each molecule
    • The number of oxygens bonded directly to hydrogens. They look like this: OH or HO
    •  The shape of the molecules
    • Any other differences or commonalities that jump out at you
    When you are ready, highlight the list below to compare your's with mine:
    • Depending on how you count, both molecules have 11 oxygens, unless you left out the one oxygen outside the bracket in cellulose. Oxygen is pretty electronegative, which means it's often reactive. You may be familiar with this property for oxygen's well known part in combustion (burning) and it's role in rusting metal.
    • Cellulose has 20 hydrogens and sucrose has 22, but cellulose would totally have 22 hydrogens guys, if it wasn't on endless repeat. Those naked oxygens on the end, if they weren't bonded with another cellulose unit, would be hooked up with a hydrogen.
    • Both molecules have the same number of carbons. In carbohydrates, carbon acts as the backbone to which all of the other elements or groups of elements attach to. What other elements and groups attach to the carbon determines the special properties of the entire molecule. But hang on a second, as we have inventoried, there really isn't that much of a difference of ingredients between cellulose and sucrose. What gives?
    • Look at how those ingredients are arranged. Just like when you are baking, the same ingredients don't always produce the same results. In our case, cellulose has 6 OH groups and sucrose has 8. In cellulose, these spots are where the magic happens when it comes to dyeing. More on that in a future post.
    • Furthermore, the shape of the molecules are different. Give or take a couple of details, the left half of both molecules are the same. But look at the right half. Cellulose repeats and then flips the left unit. There is a name for this unit, it's called glucose. The right half of sucrose has a pentagonal shape instead of an octagon. This unit is called fructose. To summarize, cellulose is made of repeated glucose units and sucrose is made of just a glucose and a fructose bonded together.
    • You might have noticed some other things like how cellulose repeats its units. This means we call it a polysaccharide, or more generally, a polymer. Sucrose is made of just a couple of units so we call it a disaccharide.
    • Maybe you also noticed that the oxygen that bridges the gap is up in cellulose, and down in sucrose. This link between units is called a glycosidic bond. Good eye. I have to confess though, of all of the ways of representing these molecules, the way I chose to draw them is not very accurate geometrically. None the less, the orientation of the oxygen in the glycosidic bond is very important, and I will go on and on about it in a later post when I discuss the physical structure of cotton.
    So, did I miss anything? Did you notice a similarity or difference between cotton and candy that I didn't find? Kindly share in the comments below. I'll be talking about the chemistry of cotton dyeing soon, which is pretty good timing because I currently have picked all of the seeds out of my cotton bolls and am ready to start the process. If you're 

    Thursday, June 9, 2016

    Why I'm Spinning Cotton: 002 Wooldn't You Like to Know

    So I don't know about you, but I'm looking for an activity to keep me out of trouble, and as I discussed previously, I've landed on spinning, for many reasons, but mostly because my mother gave me her wheel. I was happily flapping the treadles up and down, and the flyer was making such a lovely breeze, until someone interrupted me and asked what I was going to spin. I was perfectly happy spinning the air, but as it turns out, there's quite a variety of fibers that you can tangle together into thread and yarn. Upon a little bit of research, it seems that nobody just picks one fiber to spin. There's all kinds of animal fibers, including a wide array of sheep breeds, alpaca, qiviut, memorial cat hairballs, and insect excretions. There are plant fibers as well, such as bamboo, flax, hemp, and my choice, cotton. There's also a bunch of synthetic bullshit too. It seems that people like to blend a lot of this stuff together, possibly because these fibers have a variety of properties that one would like their final fabric to have. Or maybe it's more fun to just mix a bunch of fuzzy stuff together and see what happens. This is way more than I can handle. Have you been to Ravelry? Of course you have, it's an amazing site and community. One of the things that strikes me though is the huge amount of supplies and equipment some of these folks end up stockpiling. Just check out anyone's attempt to destash, which is a polite term for making your clutter someone else's problem. Often a destash is composed of a little bit of this and a little bit of that. Some dyed silk sampler because, oooh! It's prettyful! and a couple of ounces Corridale leftover from a colorway where all the good hues got used up, and some soy from that vegan phase you were going through. Yeah, I can't deal with this much random stuff, so I'll just make it really simple. I'll just do one fiber, and that will be cotton. Why?

    © New Zealand Films


    Because screw wool, that's why. Whoa! Now I've gone too far you say. That's a pretty bold statement for one of the greatest fibers in the history of the world. So let me congratulate wool for it's amazing properties before I get back to hatin' on it:


    • Wool is flame retardant without any additional treatment. If you take it away from a flame, it's just got no passion for combustion, and will self-extinguish.
    • It's incredibly absorptive. It's hygroscopy allows it to absorb your perspiration, which will apparently keep you cool in the heat, a feature I have never in my life experienced.
    • Wool felts easily, unlike my hair, try as I might during that whole Boho trend.
    • It doesn't wrinkle.
    • It's really stretchy.
    © New Zealand Films
    For only three of the above reasons I own exactly one wool jacket that I use solely for funerals and job interviews, and thankfully it's lined because wool is scratchy as hell. I've heard people come to the defense of wool, saying that it just wasn't prepared or spun properly, or it was the wrong breed, or came from an unhealthy animal. Maybe I'm just oversensitive then, because I have yet to meet a wool fabric that didn't make me want to crawl out of my skin, and every time I rub sheep sebum (lanolin) on my lips, they crack and bleed. Maybe it's allergies, maybe it's psychological scarring. I accidentally took and animal science class in college once. During the first lab, a sheep dragged me through poop and then the rest of the flock nearly trampled me. I can still hear the thundering of their hooves, darting around my huddled form. Although, in the next lab we got to put our hands in a fistulated cow and that was kinda interesting, and then we got to make our own ice cream. No regrets.

    Anyway, cotton. 

    • It's lightweight and breathable.
    • It's soft.
    • Common varieties are naturally white, so less need for bleaching.
    • It's a plant. So, instead of growing plants to feed animals for their fiber, you can just skip the middle-man. Also consider that animals require husbandry and produce waste. What I'm proposing here is that cotton is more sustainable than harvesting animal fiber.
    • Cotton is stronger when wet, not to be confused with Bon Jovi album, Slippery When Wet.
    There are also a lot of problems with cotton. It's not as elastic as wool, but whatevs. Make some jersey out of it then. Cotton has a pretty short staple length (meaning the fibers are really short) which presents different challenges for the handspinner. Because of this, there's a lot of negative sentiment out there about the difficulty of spinning cotton, and as such, it makes finding help or a community of cotton spinners not as easy as finding good resources for handling animal fibers. Cotton is also pretty hungry for oils, which makes some folks complain that spinning cotton dries their hands. Despite these nuisances, it's still my fiber of choice. Why?
    Cotton fiber, picked from the boll, seeds not yet removed.


    My father grew some cotton, and I feel like I have to use it. 

    Moving forward, I'm interested in learning more about the fiber itself, such that I can address the challenges of preparing the fiber for spinning and use as a yarn. I'll share with you what I find out.